Taking Hostages -- DQ2 Progress Report for October 2021
We mix things up in four new levels during which the White Hats and Black Hats briefly trade party members
Howdy Defender's Quest fans!
Defender's Quest version 0.0.25 is up on Steam for all of our early backers. Unfortunately I borked my Linux partition somehow and will have to reinstall it, so our faithful Linux users will have to get by using Proton this month, but I will try to have it fixed by next month (been meaning to do some maintenance anyways).
So what did we get done this month?
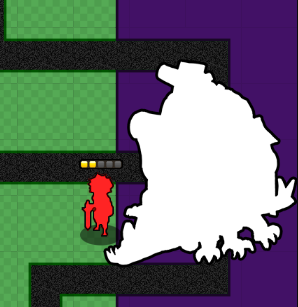
For one, we made the "turtle tank" ships a lot bigger:

Given DQ2 maps have a lot more space, we can afford to increase the size, and I think this will look a lot nicer and emphasize the sense of scale. To be fair this scale is still an abstraction for the sake of gameplay, the actual person-to-ship ratio in-universe is much bigger, but it does get the point across that the ship is supposed to be much bigger than the little dudes. When we get the art in I think it will look really cool.
"But wait!" says the keen-eyed viewer. Isn't that Jumper, the leader of the Black Hats? What's he doing next to the White Hats' ship? Read on and you shall see!
Ongoing tests have dialed in the first two sequences pretty well to the point that we're happy with that design and convinced the game's approach is fun. The first two sequences represent what will likely wind up being our public demo content.
We've always had a grand master plan worked out for what's going to go into each level clear to the end of the game, but any veteran game dev can tell you that when that plan makes contact with reality you'll find things that just don't work. Case in point – White Hats sequence 2, the series of levels that begins right after we finish the boss battle that terminates Black hats sequence 1.
We've just finished being introduced to the weird and wonderful Black Hats, the antagonists of the White Hats (the party we started the game with) and now our perspective returns to our original set of heroes for the first time. In previous iterations these levels always felt a bit flat. Having just finished strong with the Black Hats, there's a palpable desire to just put both parties together already so you can finally play with all of your shiny toys. However, I know it's a bit too early to do that. If we just cram them both together at once we'll jump from managing 4 unique characters to 8 unique characters all at once, and the cognitive load and complexity of the levels will jump too sharply.
The original plan was to keep the cognitive load down by doing two more sequences where you just follow one party or the other. But this is where we reach our other design challenge – given that DQ2 does not have generic clones of hero characters, and it has a much bigger map, the white hat sequence 2 levels always felt like a let down coming off the recent excitement.
One of the classic tower defense dilemmas is to make the player trade off map coverage with damage concentration; the trouble is the White Hats as currently designed are just too few in number to do more than one of those things, and in White Hats sequence one the whole theme was learning how to use them together in a killbox. We do have our minion system we're introducing, and that has helped, but it felt like we were still missing something to just make it click, shakes things up, and push the excitement forwards.
That's when James, our writer and my co-designer came up with a great idea – what if the parties trade hostages? The story justification for this is TBD, but what happens mechanically is that when you start White Hats sequence 2, you will be missing their "White Splash" AOE/Support/Healer character, and gaining "Jumper" from the Black Hats, the melee unit that can jump instantaneously between two locations. This solves nearly all of our problems in a pretty elegant way. It gives you a foretaste of using both parties together without overloading you with too much, and it mixes up the party configuration so it's not an exact retread of what came before.
White Hats sequence 1 was all about teaching you the basics of the game and reinforcing the idea of using your units together to build an efficient killbox – Bouncer in front to tank damage and buy time as he hurls units back, Zerk to concentrate damage and kill stuff, White Splash to keep both of them alive and buff their damage, with Long Shot as your only real option for covering a second lane.
Now with Jumper on the team, you are much more versatile and can more easily cover multiple lanes. And without White Splash, you don't have the attack buff that encourages you to clump up in one optimized killbox.
We then throw in two minions, trying to keep them as simple as possible – an Area of Effect machine just called "AOE" for now, and a medium-ranged spread shot projectile machine called "medium shot" for now. This was enough to rough out the four battles that will constitute the second White Hats sequence.
Fair warning, it's still pretty rough and there's likely some bugs. But I know what we're doing for this sequence now, as well as the next one with the Black Hats. Once those two are done, then we'll bring both parties together for, which is when the real fun begins.
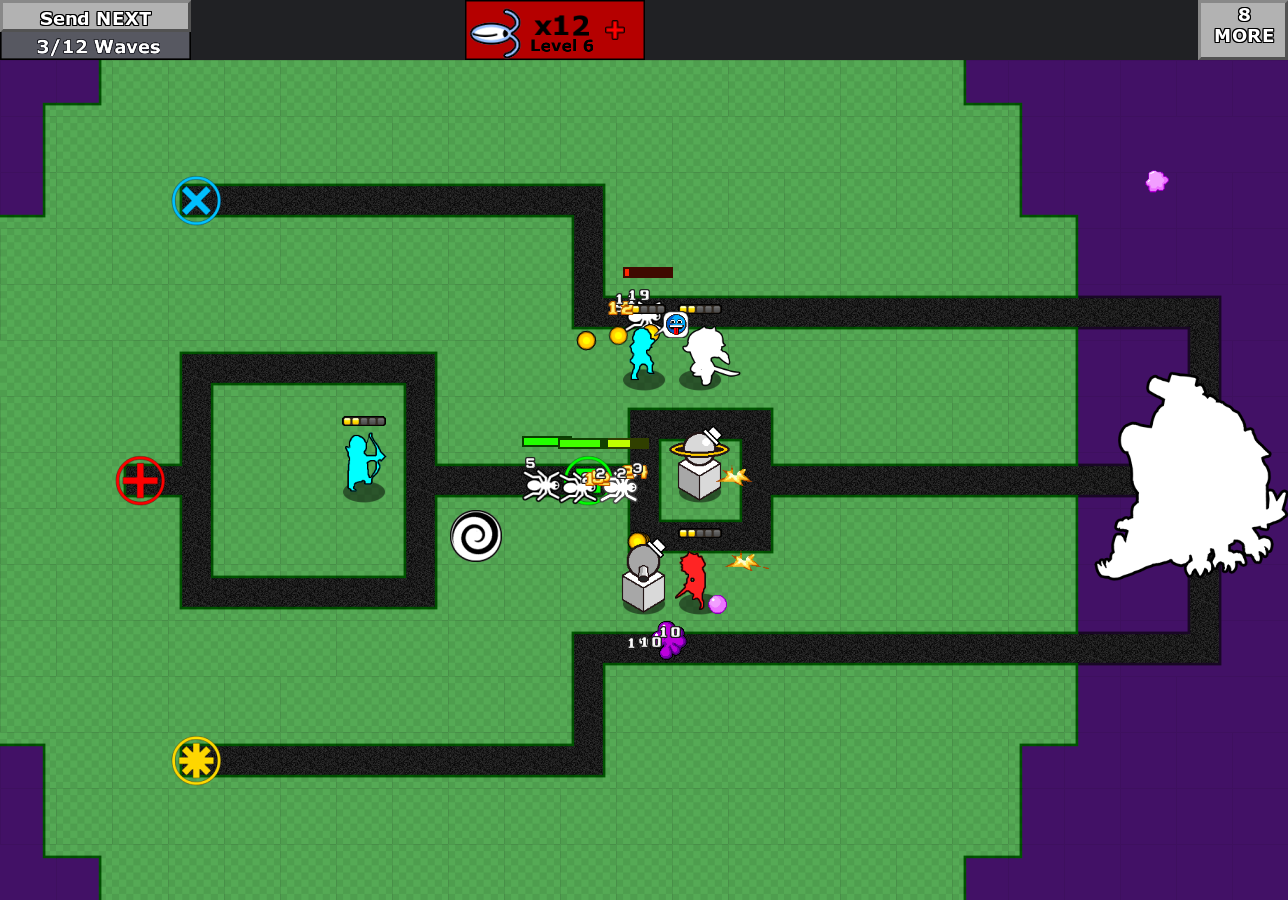
Here's a quick overview of the four new levels:
First, we present the player with two paths to manage at once. Having Jumper on your side is kind of like having five units, which makes it possible to build a killbox on one end, and back up Long shot on the other. There's more than one way to handle this, of course, but the general point is to set up two teams and jump back and forth between them.

Next, we give the player some backup units in the form of the AOE and Medium Shot machine minions, on a level with three lanes that converge on two different choke points. You can build two kill-boxes now and have a bit more flexibility how you want to configure them.
The next level takes this theme of "three lanes, but you can choke down on two of them" and varies it a bit:
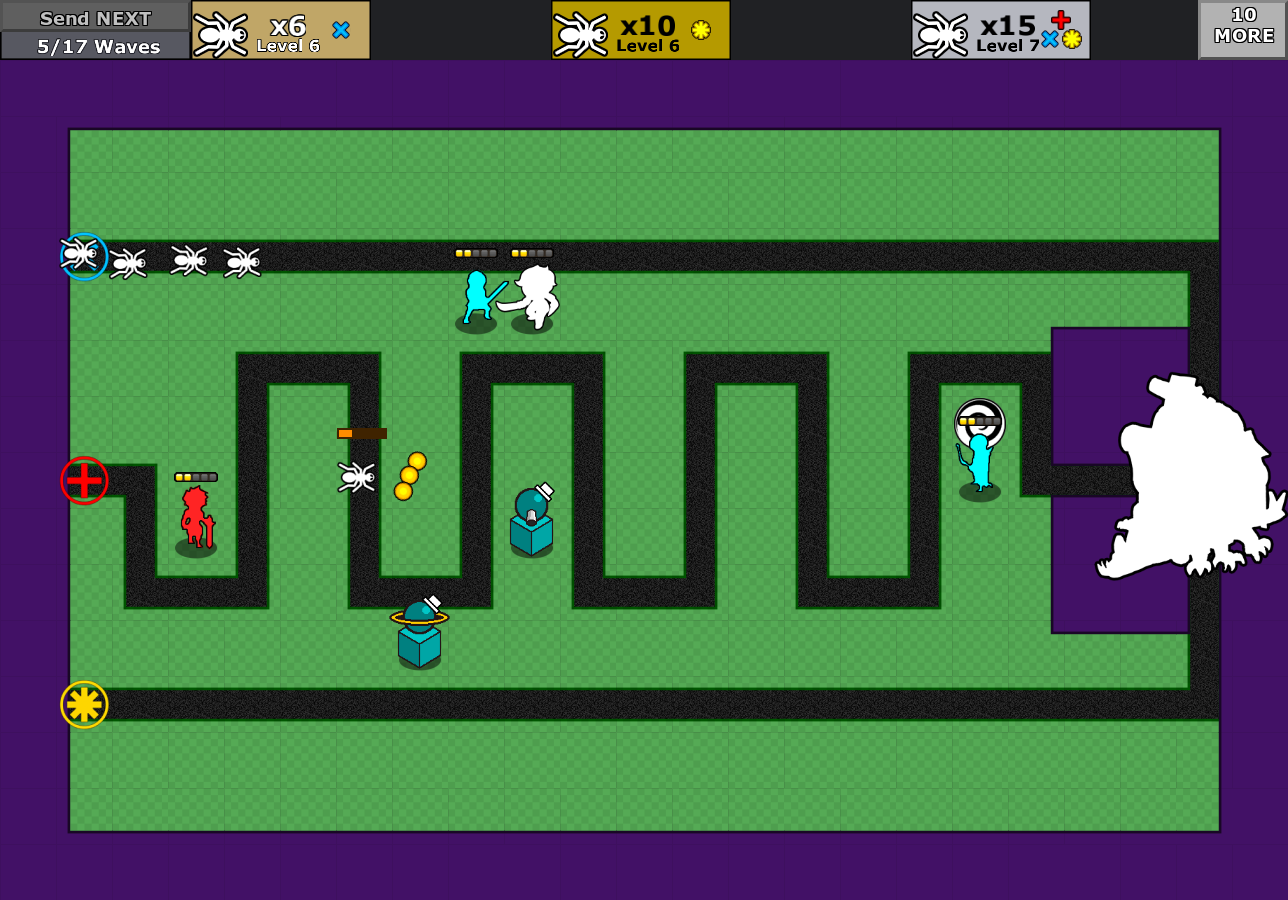
Now you've got two straight lines that enemies travel across very fast without great surface area for a kill-box, and one twisty one that takes much longer and is full of peninsulas for easy damage maximization. There's multiple points across the map where your defenders can hit two lanes at once. Here we test your ability to cover three lanes simultaneously while also making sure to dish out damage as necessary. Special care has been taken to make Long Shot's placement interesting as well – if you want to maximize the long range damage bonus you'll only get great coverage on two lanes.
The last level is still pretty rough, but is meant to be a "final exam" of these lessons. I had originally considered making it a boss battle but I think it feels better just being a hard end-of-sequence level filled with well chosen conventional enemies.
The idea here is to invert the previous level – with two slower paths on the outside and a fast lane in the middle, and this time attach a specific kind of enemy to each lane – normal on top, fast on bottom, and heavy-hitting attackers in the middle. It's not well balanced yet, but the basic through-line is there.

Next month I'll run these new battles past some testers and whip them into shape, fix some bugs, and move on to Black Hat sequence 2. In that sequence, White Splash is subbed in as the "hostage" and Jumper is missing, and the first two parasite minions making their debut. The Black Hats will have to learn how to play without their show-boating leader, making more thoughtful use of units like Assassin and Ultimate, with Collector and White Splash doing support.
See you next month!